Again this is very much a blast from the past, early 2013 to be exact. Got me my first mention on hackaday.com and on the dangerousprototypes.com blog! It started on the DP forum but have copied here for my reference.
Hello All, I’m not sure if this is the right place to post something like this as its not really that electronically advanced. But it was fun to make so I thought I would share 🙂
Long story short, I get a lot of stick for not buying flowers (I think they are a waste of money) so I decided that I was going to make some that would never die.
My first step was to find some way to make flowers, I decided on felt because I could buy it cheap from ebay. Some googling lead me to this tutorial for making LED flowers out of felt (http://techdiy.blogspot.co.uk/2007/10/moonlit-flower-step-by-step-instruction_16.html{.postlink}). I liked the idea, seemed pretty simple but I wanted a bunch of flowers (started off at 12 but they took way too long to make so ended up with 6)
So using the stencil I cut out the shapes from red and pink felt. 6 red and 6 pink which makes 3 flowers of each colour. Initially when you only do half the flower they don’t look great but once 2 put together they look alright.

My next task was to build something to hold batteries. As I was going to use 6 LEDs I wanted to use 3 AA batteries to give me 4.5V. I ordered some perspex tube off ebay (OUTSIDE D / WALL TH / INSIDE D: 20mm od / 2mm w / 16mm id Length of tube: 200mm £2.20) to hold the batteries. Then I drilled a hole through the tube at one end and placed a pin, then I calculated the distance of 3 batteries and the width of half the spring I had then drilled 2 holes through the tube. Then I inserted some hard aluminium wire (again off ebay for 2m around £3) through the spring. It actually worked well as you can see in the photo.
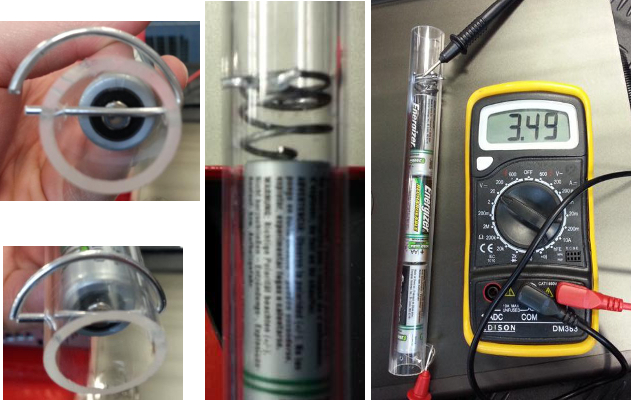
Next I placed the LED through the centre of the flower, soldered a resistor directly to the leg and then soldered wire to the LED and resistor. I used a 33 Ohm resistor calculated from 20mA current, 3.8V forward voltage with a 4.5V supply. Actually should have used 47 but 33 was all ‘I could find.
Ive now run out of steam making all the images into 1 for the thread so they are all available here 🙂 feel free to browse at your leisure https://drive.google.com/drive/folders/1Bjm5iQXT6aVdwsiJ0bzB_EvIDqYWTrXa?usp=sharing{.postlink}
Then using the aluminium wire I created hoops for the flowers to sit in then put the wires and aluminium stem into some green heatwrap and shrunk it. This worked really well I thought, but I realised that I did not need the hoops to hold the flowers and hence chopped them off.
Next came the on/off switch. I soldered 2 wires to a toggle switch then placed it in the end of the tube and went to town with the hot glue 😀 After this I used some tie wraps to attach the stems of each flower to the perspex tube. This was very fiddly. Then came my biggest problem, I needed to join all 6 +/- wires together. I decided to wrap some non insulated single core wire around the perspex tube and solder to it. I used some tin foil as you can see in the photos, this wasn’t used as a conductor merely to dissipate the heat from soldering. Good idea? Bad idea? not sure yet. I did the same thing for the negative wires and connected them to the switch.
The positive ring I connected to some wire which is just wrapped around the pin at the bottom of the stem touching the battery, this seems to work great and allows me to change the batters (which I need to do).
Finally once everything was done I heatwrapped the entire stem. I used some wrap similar to whats used for RC car batteries. It has a shiny plastic look unlike the one used for the stem. I instantly didn’t like it! I then tried to wrap the entire thing in electrical tape that was green, again it didnt quite look right. Finally I decided to cover the lot in felt, this hid the tie wraps alot better and gave a better look I think. Because the only batteries I had are rechargeable they only produce 3.6V which wasnt enough to light up the pink LEDs but im hoping with normal batteries giving 4.5V it will work ok. Finally thing looked as follows.
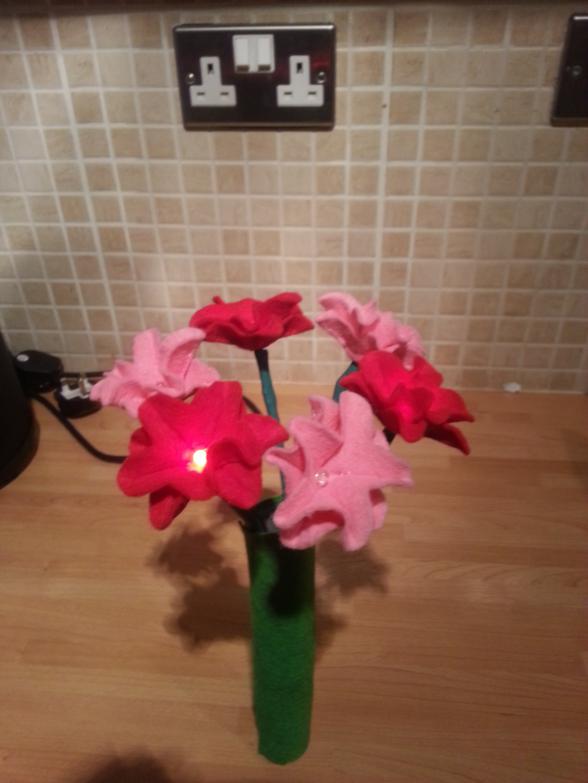
I will try post another when I get the pink LEDs working too. 🙂
EDIT: Having now swapped 3.6V rechargeable batteries for 3 normal ones (4.5V) the LEDs all light up 😀
